
Configuring a Dimodelo Data Warehouse Studio Project to target Azure Synapse Analytics
Configure Azure Synapse Analytics
Prerequisites
Create Azure Synapse Analytics database
The target Azure Synapse Analytics database must exist in your Azure Tenant. Dimodelo Data Warehouse Studio does not create the database.
Create an SQL Server Login
Create an SQL Server Login in the Azure Synapse Analytics database.
- First, connect to the master database via Visual Studio SQL Server Object Explorer:

- Next, run the SQL to create the SQL Server login: CREATE LOGIN LoadUser WITH PASSWORD = ‘<strong password>’;
- Then connect to the target SQL Server database and run: CREATE USER LoadUser;
- Then add the user to an appropriate role e.g. EXEC sp_addrolemember ‘db_owner’, ‘LoadUser’;
- and finally, add the user to a resource class: EXEC sp_addrolemember ‘smallrc’, ‘LoadUser’;
Configuration connection strings for the Data Warehouse
For each Configuration in the Dimodelo project, it’s necessary to define the connection strings to the Data Warehouse, Staging and Batch databases. Your Development, Test and Production etc configurations will target a different set of databases.
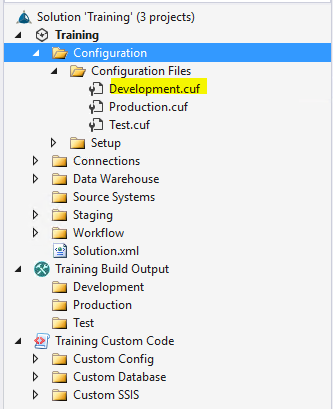
- Double click the configuration file in the Dimodelo Project.
- Choose the connection you want to configure.
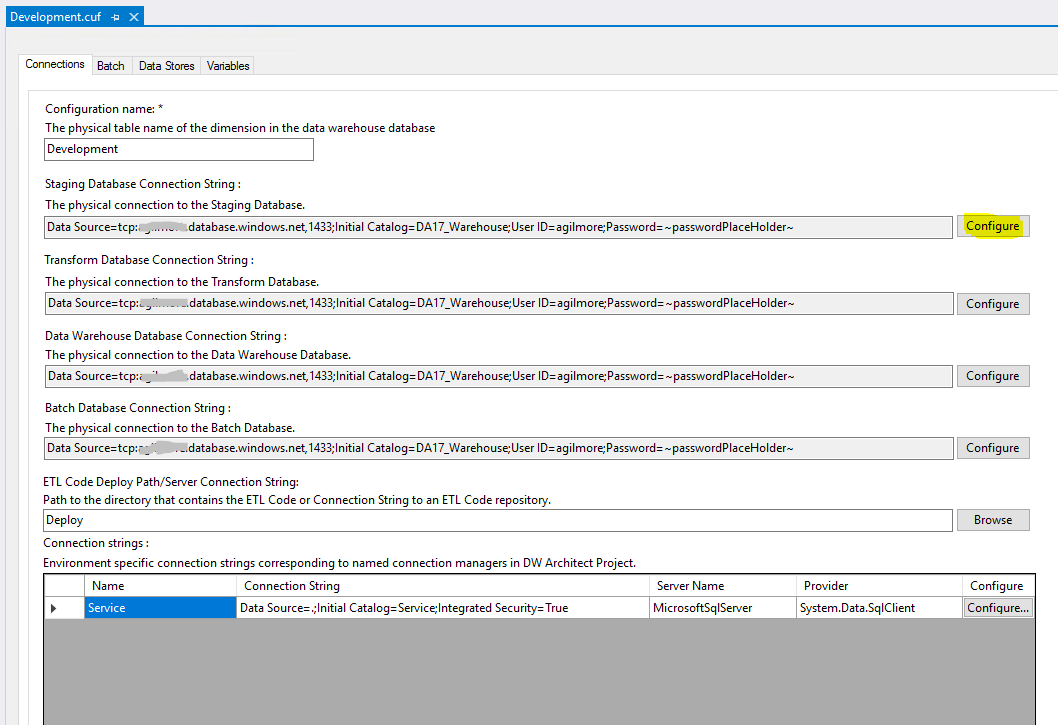
- Edit the connection information:
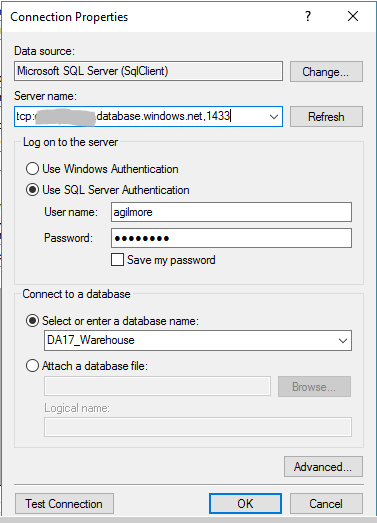
- Only the “.Net Data Provider for SQL Server” (aka SqlClient) supports connectivity to Azure Synapse Analytics.
- Use SQL Server authentication with the SQL Server login you set up in the prerequisites.
- Select or type in the name of your target Data Warehouse.
- Note the server name includes the tcp: prefix and ,1433 port. e.g. tcp:servername.database.windows.net,1433
- Do the same for all four target connections Data Warehouse, Staging, Transform and Batch databases. The database needs to be the same for all four.
Configure the Azure Data Lake Gen 1
Prerequisites
- Dimodelo lands data into an Azure Data Lake. It’s necessary to create an Azure Data Lake instance.
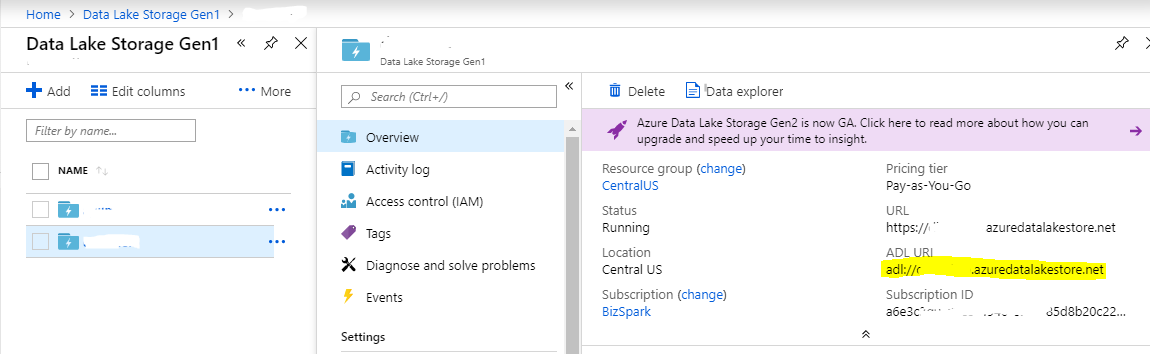
You will need to keep a note of your Azure Data Lake URL. It can be found by navigating to your Azure Data Lake in the Azure Portal, on the overview page, expand essentials.
- To gain access to Azure Data Lake from Dimodelo shift running on-premise, it is necessary to create an Azure application, give it access to the Azure Data Lake and then configure Dimodelo with the necessary authentication configuration. Follow the process explained in this Service-to-service authentication with Azure Data Lake Storage Gen1 article.
Here are some additional Tips:
- Use the Redirect URI https://www.dimodelo.com. This is simply a dummy entry.
- We recommend you name the application DimodeloShift. You will need to note the Application Id, Secret Key (aka Authentication Key) and Tenant Id (aka Directory Id) for Dimodelo configuration.
- Keep a note of the OAuth 2.0 token endpoint(v1)
- Create and Configure access to the folder. https://docs.microsoft.com/en-us/azure/data-lake-store/data-lake-store-access-control
Configure the Azure Data Lake Gen 1 landing Data Store
For each Configuration in the Dimodelo project, it’s necessary to define the connection strings to the Data Warehouse, Staging and Batch databases. Your Development, Test and Production etc configurations will target a different set of databases.
- Double click the configuration file in the Dimodelo Project.
- Navigate to the Data Stores tab. This tab lists the Data stores in the solution (i.e. Database, data lake etc) and the storage/integration technology associated with each data store.
The storage technology for the Landing Data Store is Azure Data Lake. This needs to be configured with the information gathered in the prerequisites section. Click on the … button to show the properties editor.
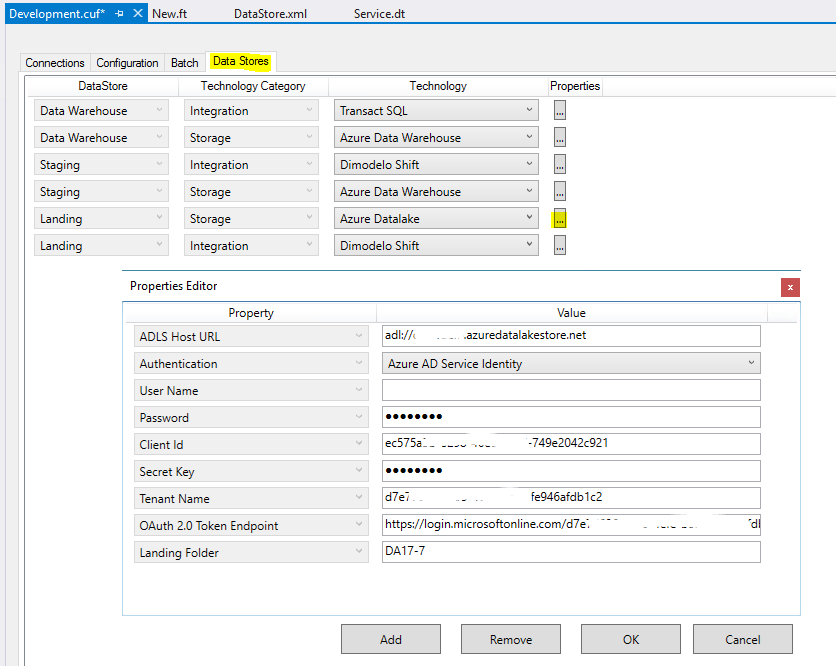
- ADLS Host URL. This is the Azure Data Lake (ADL URI) URI you noted from the Azure Portal in the prerequisites section.
- Authentication. Select “Azure AD Service Identity”
- User Name and Password. Leave blank.”Azure AD Service Identity” doesn’t use a User Name and Password.
- Client Id. This is the Application Id of the DimodeloShift application you created in the prerequisites section.
- Secret Key. The Secret Key/Authentication Key you created for the DimodeloShift Application in the prerequisites section. After you save the configuration file, the secret key is encrypted, and can only be decrypted by Dimodelo Shift.
- Tenant Name. The Tenant Id you noted in the prerequisites section.
- OAuth 2.0 Token Endpoint. The OAuth 2.0 token endpoint you noted in the prerequisites section.
- Landing Folder. The root folder in the Data Warehouse where this Dimodelo Data Warehouse Studio Solution will land its data. Dimodelo will create this folder.